ComfyUI with ZLUDA for AMD GPUs on Windows
This guide was originally written for an AMD Radeon 780M, but this should also work for 680M and other AMD GPUs. The main difference will be the library files you copy over.
Affiliate links in this guide help support this documentation at no extra cost to you.
This guide was created for the AMD Radeon 780M integrated graphics using Windows. For a guide on the AMD Radeon 680M see the ComfyUI with ZLUDA for AMD 680M doc. The mini-pc used in this example is the GMKTec K12 with a 780M , which has the Ryzen 7 H 255 CPU, 32GB of DDR5 5600, and a 512GB SSD. This is now my primary Windows PC and it has been fantastic. One major benefit is the Oculink port which allows for an external GPU if you ever want to upgrade from the 780M.
Overview
ZLUDA (CUDA on AMD) is a compatibility layer that allows CUDA applications to run on AMD GPUs. This guide will walk you through installing and configuring the ComfyUI ZLUDA specifically optimized for AMD hardware, including the AMD Radeon 780M integrated graphics.
What you’ll need:
- A system with AMD Radeon 780M integrated graphics
- Windows 10/11 (ZLUDA currently works on Windows)
- At least 16GB of system RAM (more is better for larger models)
- ~20GB of free storage space for ComfyUI and initial models
The following are some required guidelines to keep in mind from the start.
CRITICAL SETUP REQUIREMENTS
These steps are mandatory for ZLUDA to work properly:
- Use Command Prompt, NOT PowerShell - PowerShell will cause issues
- Clone to drive root (e.g.,
C:\ComfyUI-Zluda) - Do not use nested directories - Use Python 3.11.9 specifically - Other versions will cause issues
- Exclude directory from Windows Defender - (see why )
- Carefully copy all required libraries and add ons - Missing dependencies will cause failures
Not following the above will result in a painful experience. Trust me.
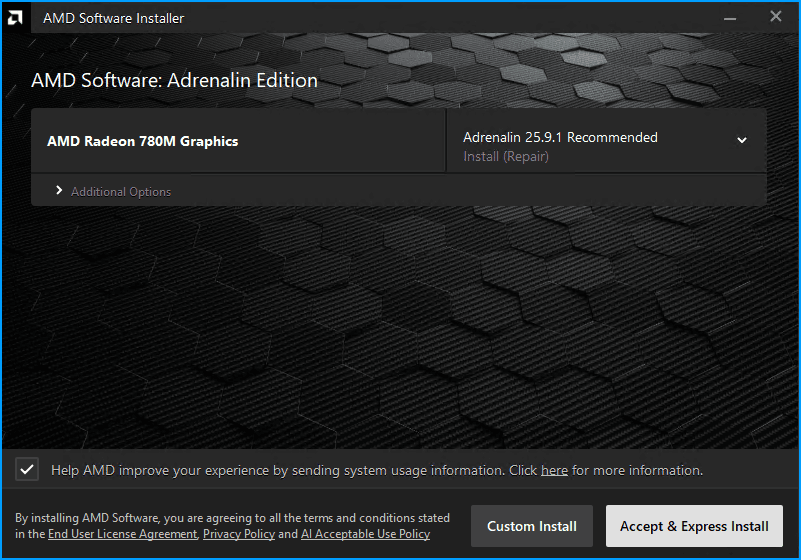
Install Latest Adrenaline Drivers
I recommending going to AMD’s Drivers and Support for Processors and Graphics and downloading the latest drivers for your AMD GPU if you have not done this already. You need at least version 25.5.1.
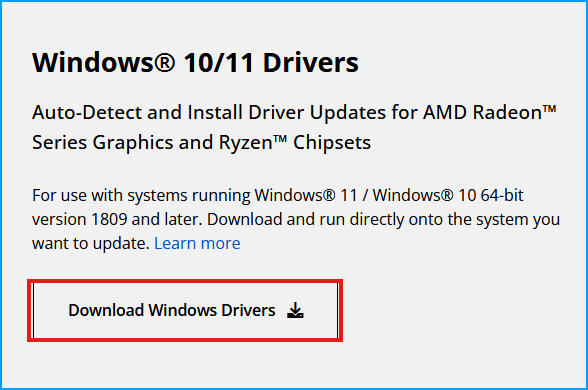
Once the download is complete, install the drivers.
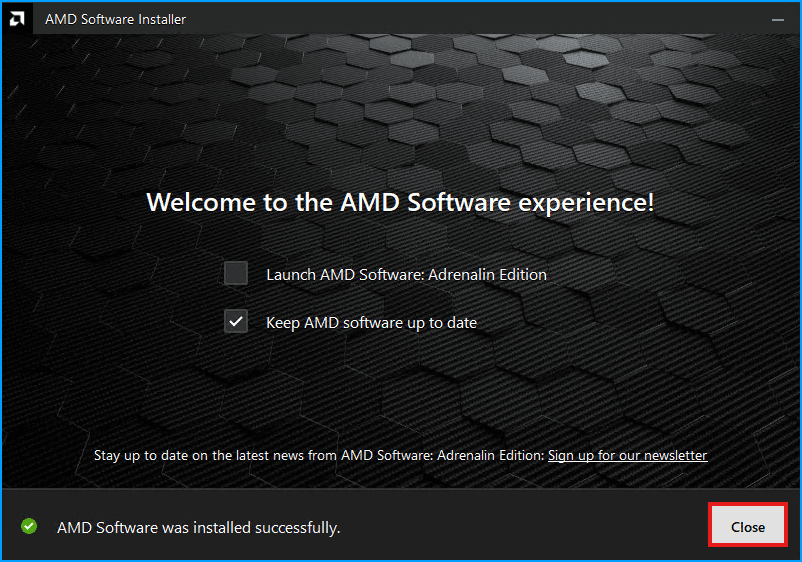
When complete, leave the “Keep AMD software up to date” if you want to enable auto updates and then click “Close”.
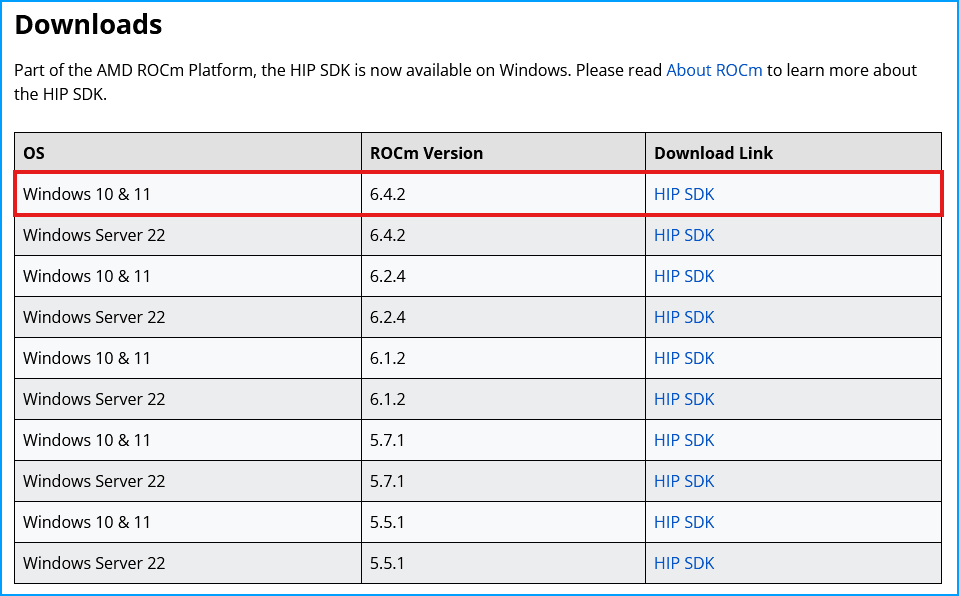
Install HIP 6.4.2 Drivers
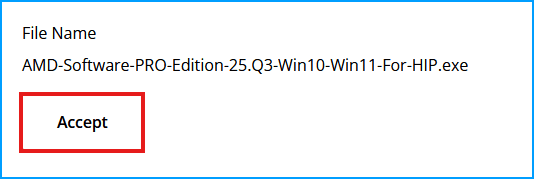
The next step is to install the HIP drivers. For the 780M version 6.4.2 will be installed. Be sure not to mix this up with the 6.2.4 as they look similar. Navigate to the AMD HIP SDK page and download the specified version.
You will need to accept the terms before downloading.
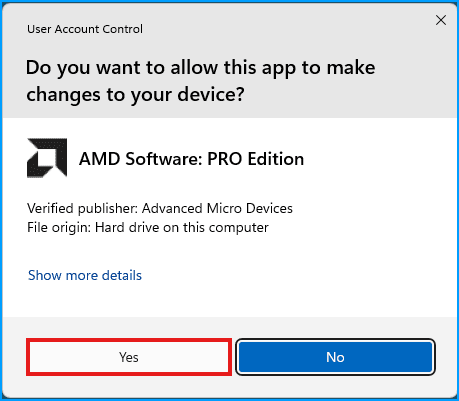
Once complete start the installation. When prompted to allow the app to make changes, select “Yes”
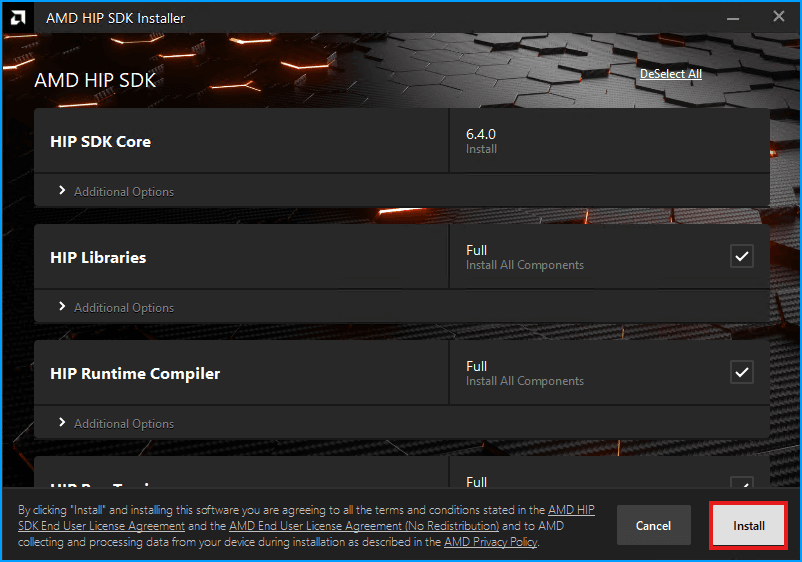
The installer will begin and it will be similar to installing the drivers. Leave all the defaults selected
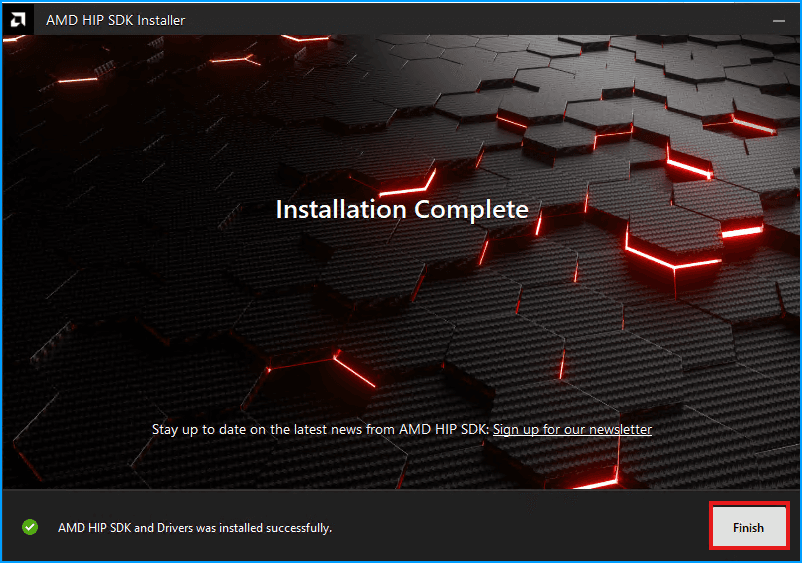
When completed, click “Finish”
If the AMD Adrenaline UI pops up you can close it.
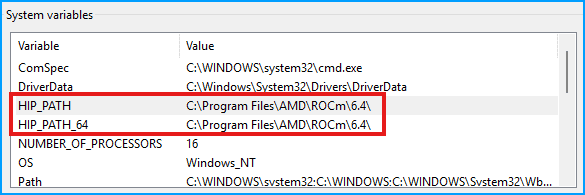
Validate and set HIP PATHs
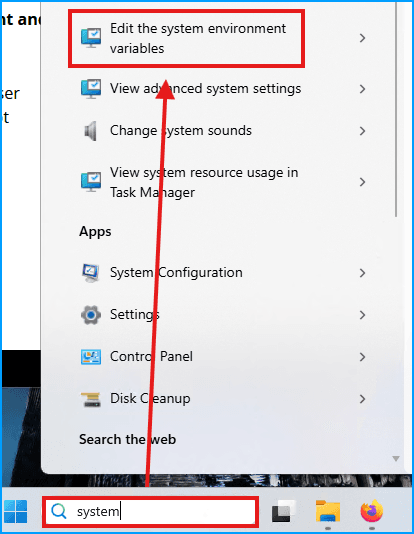
There are three environmental variables you must make sure exist. Two of them are likely already set. In your Windows search bar, type “System” and look for the menu item for “Edit the system environmental variables”.
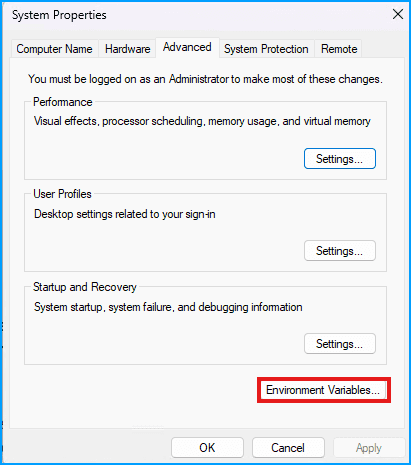
A window will pop up, select “Environment Variables” at the bottom.
In the bottom section, confirm both HIP_PATH and HIP_PATH_64 exist. They should both point to C:\Program Files\AMD\ROCm\6.4\
Now in the top section, select the “Variable” named “Path” and then click the “Edit” button.
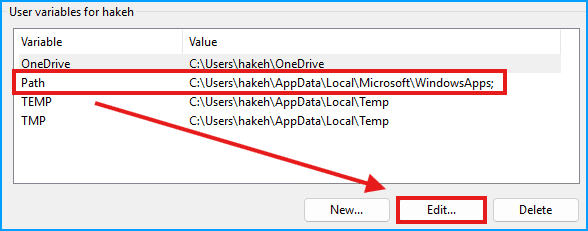
Then click “New”
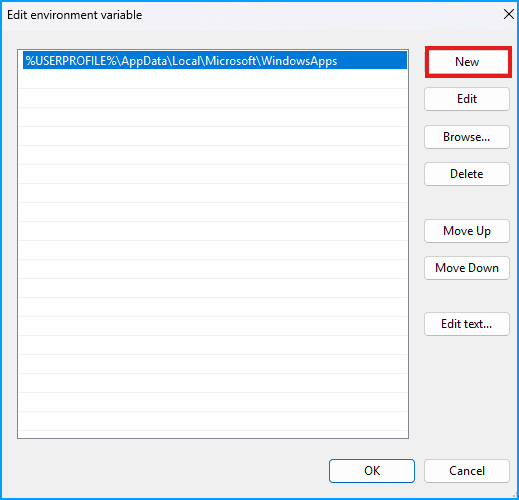
Paste in the below value, and click “OK”
C:\Program Files\AMD\ROCm\6.4\bin
Now click “OK” on the main “Environment Variables” to close it.
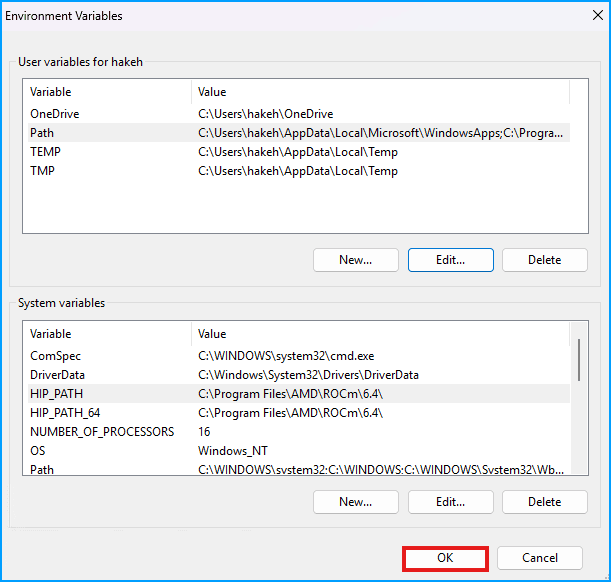
And then click “OK” on the “System Properties” window to close it as well.

Replace ROCm Library Files
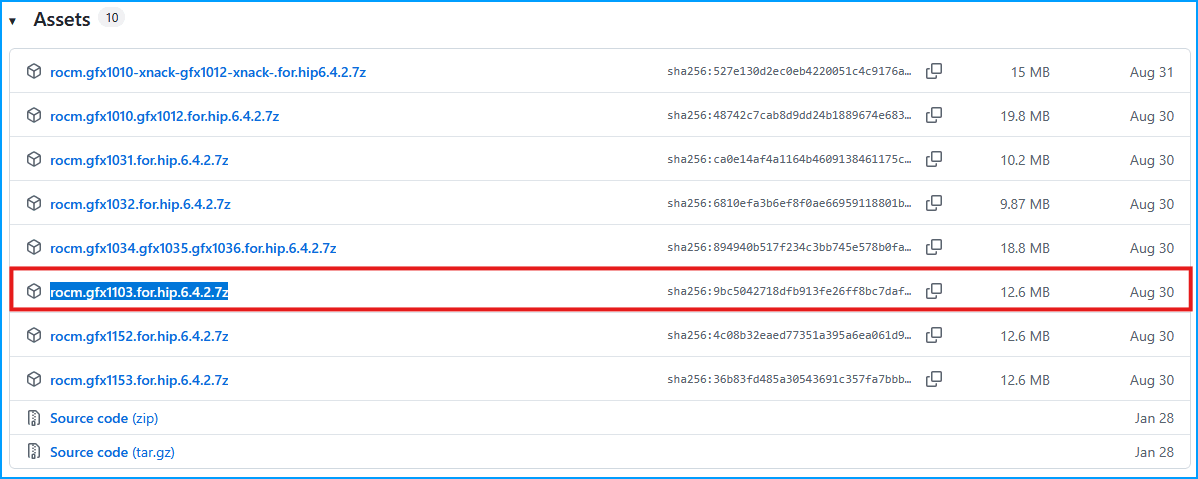
Depending on the GPU that you have, you should download the associated ROCm Library Files. On the ComfyUI Zluda repo you can see the gfx name for your GPU. This guide assumes you have a 780M.
The next step is to replace the default ROCm Library Files along with the rocblas.dll file. Navigate to the likelovewant - ROCmLibs-for-gfx1103-AMD780M-APU repo and scroll down to the “Assets” section. Then download the “rocm.gfx1103.for.hip.6.4.2.7z” file.
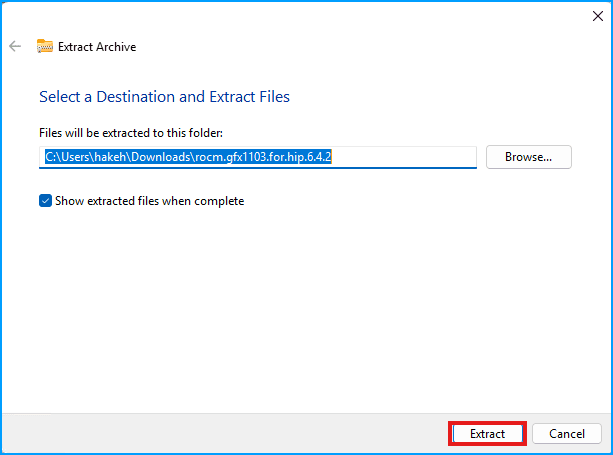
Open up the “Downloads” folder and extract the archive.
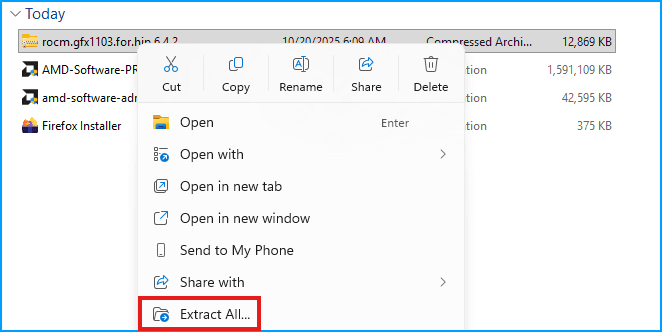
Leave the defaults and click “Extract”
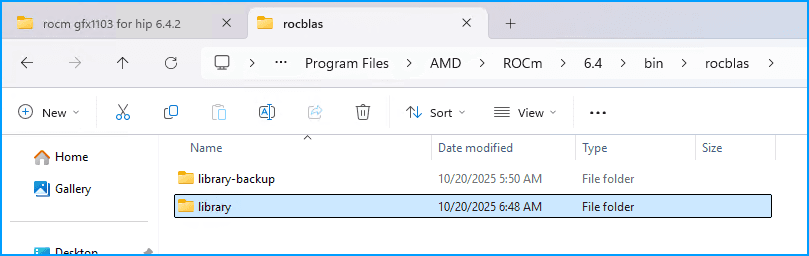
When complete, open the directory to find the “Library” folder and the “rocblas.dll”.
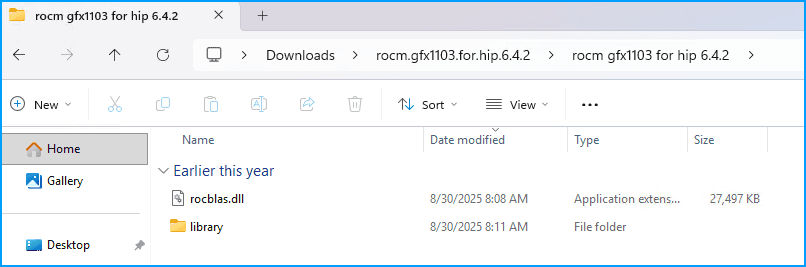
Leaving that window open, create a new tab in file explorer
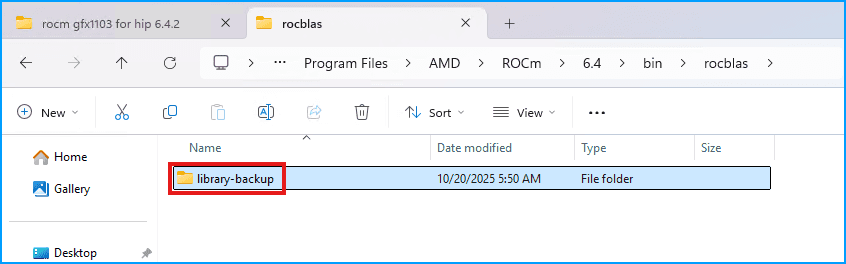
Then navigate to C:\Program Files\AMD\ROCm\6.4\bin\rocblas. Once there, rename the existing library directory to library-backup.
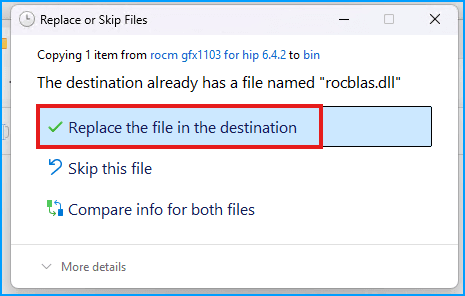
Now go back to the “rocm gfx1103 for hip 6.4.2” tab and copy the “library” folder and paste it into the rocblas folder. When prompted, select “Continue” to make the transfer.
When the transfer is complete you will have both the new “library” folder you copied over from the extracted archive, and the original folder that was renamed to “library-backup”.
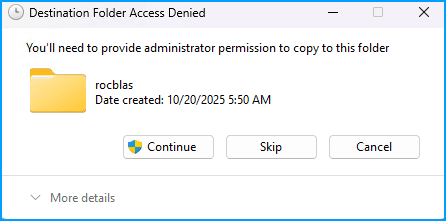
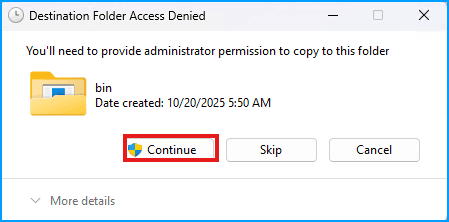
Now, navigate from the C:\Program Files\AMD\ROCm\6.4\bin\rocblas folder up one directory to the C:\Program Files\AMD\ROCm\6.4\bin folder, and copy over the rocblas.dll file. You will be prompted to overwrite the existing file which you should do.
Like before, you will also be prompted to “Continue” as this is a protected folder. Press Continue.
That concludes the changes needed for the HIP SDK.
Install Python 3.11.9
You must use Python version 3.11.9 even if you already have Python installed.
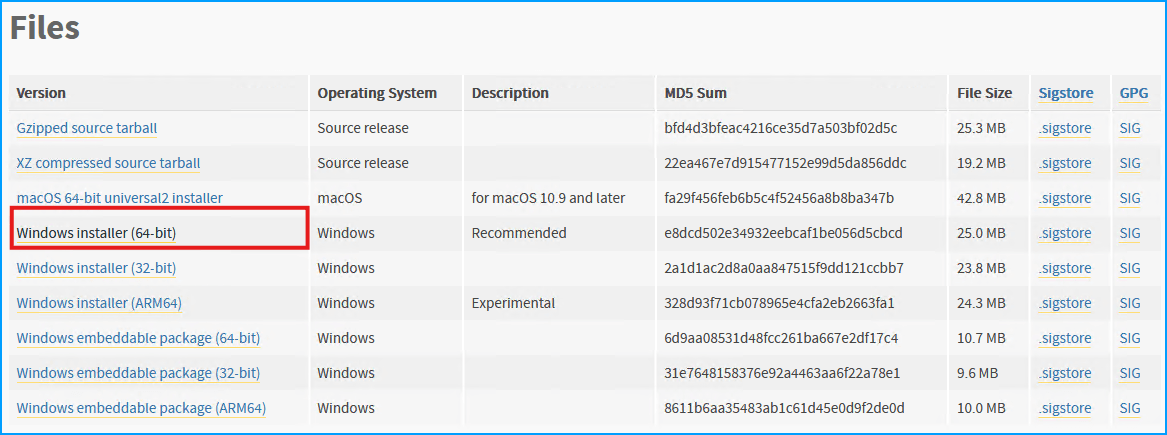
Navigate to the Python download page for 3.11.9 . Then scroll down to the “Files” section and grab the one labeled “Windows installer (64-bit)”.
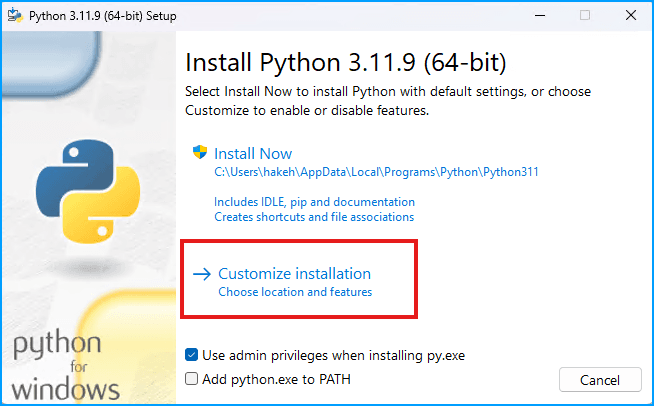
Run the installer and choose “Customize installation”.
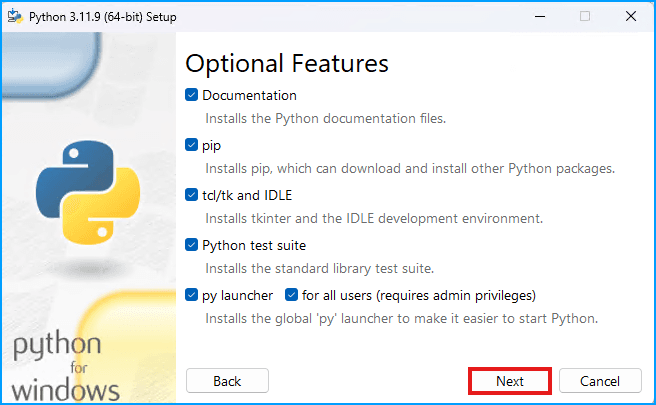
Leave all the Optional Featuers selected and click “Next”
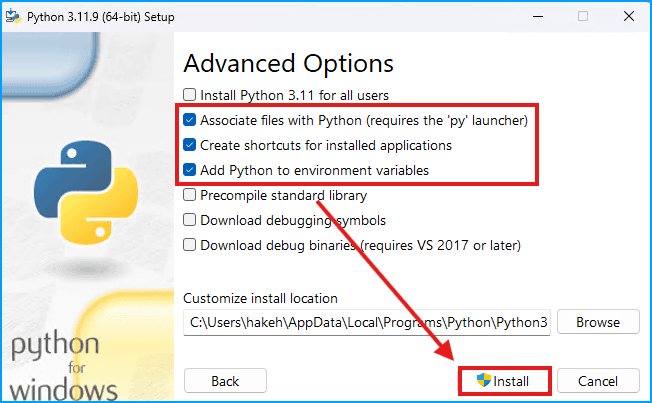
Ensure the following options are selected for “Advanced Options”
- Associate files with Python (requires the ‘py’ launcher)
- Create shortcuts for installed applications
- Add Python to environment variables
Then click “Install”
When prompted to all this app to make changes, select “Yes”.
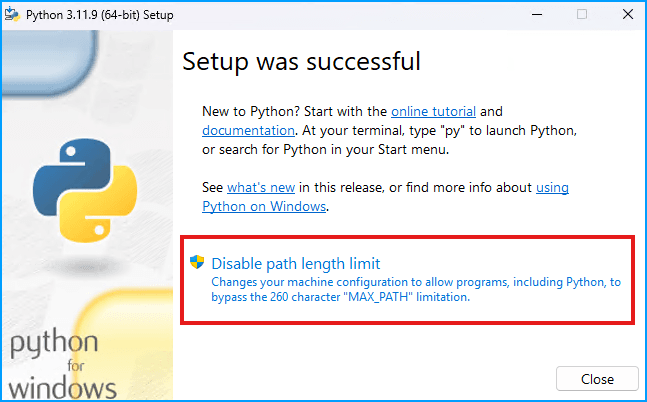
Let the installer complete, then select “Disable path length limit”.
And once again allow the app to make changes by selecting “Yes” to the pop-up. Then click “Close” to finish the Python installation.
Install Git
In order to clone the repo, you must have git installed. Navigate to the git-scm Windows download page, and click the “Click here to download” link.

Once the download completes, start the installation. As usual, click “Yes” when prompted to allow the app to make changes.

Then click “Next” to start.
“Next” again.

Leave the default selected components and click “Next”.

Click “Next” again.
Click “Next” for the editor.
Continue to accept the defaults (there will be several more) and then click “Install”.
When the install completes, click “Finish” (I uncheck “View Release Notes” as it is not needed).
Install Visual Studio Build Tools
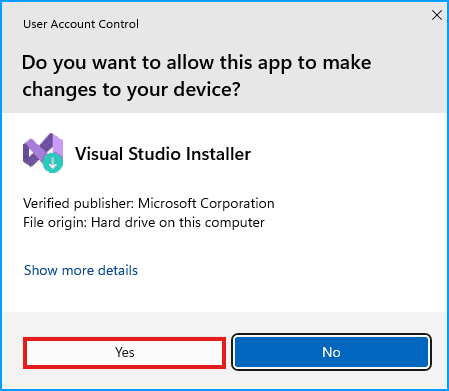
Next, click this to download Visual Studio Build Tools . Then start the installer and once again click “Yes” to allow the app to make changes.
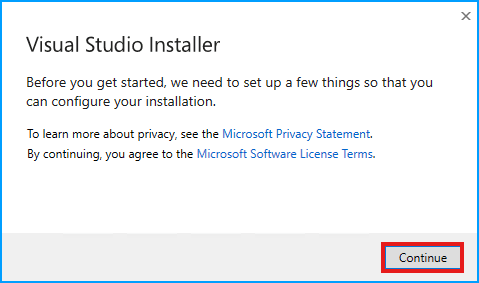
When prompted, click “Continue”.
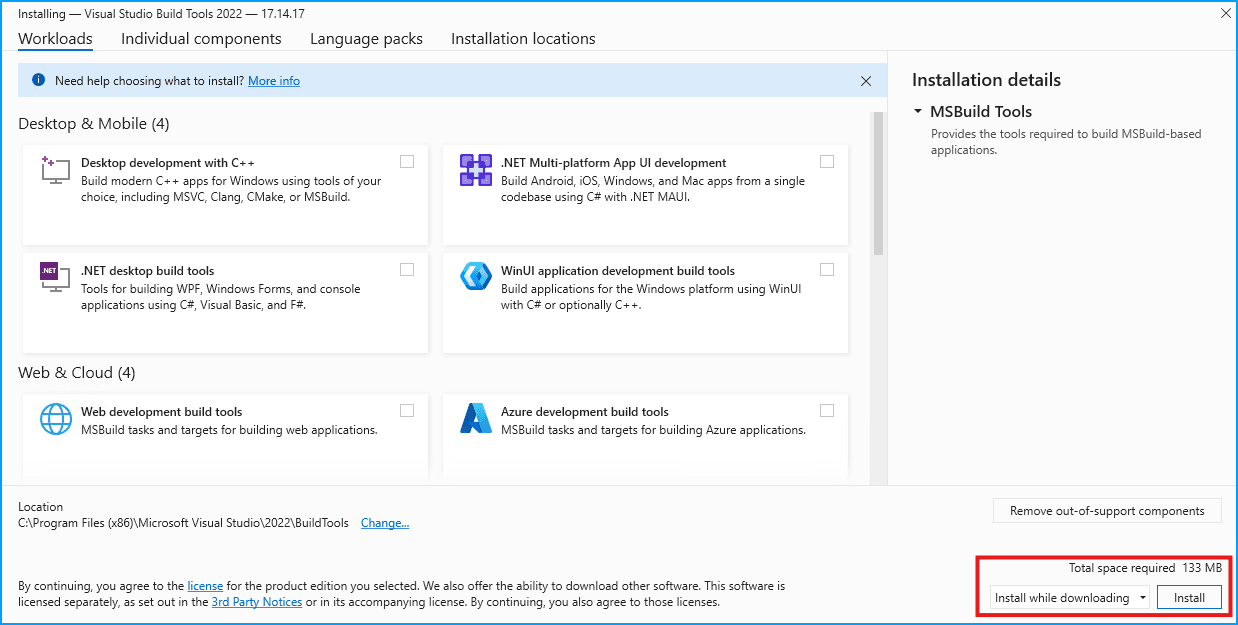
There will be a few progress bars which complete, and then the installer will open. Simply click the “Install” button with the default selections.
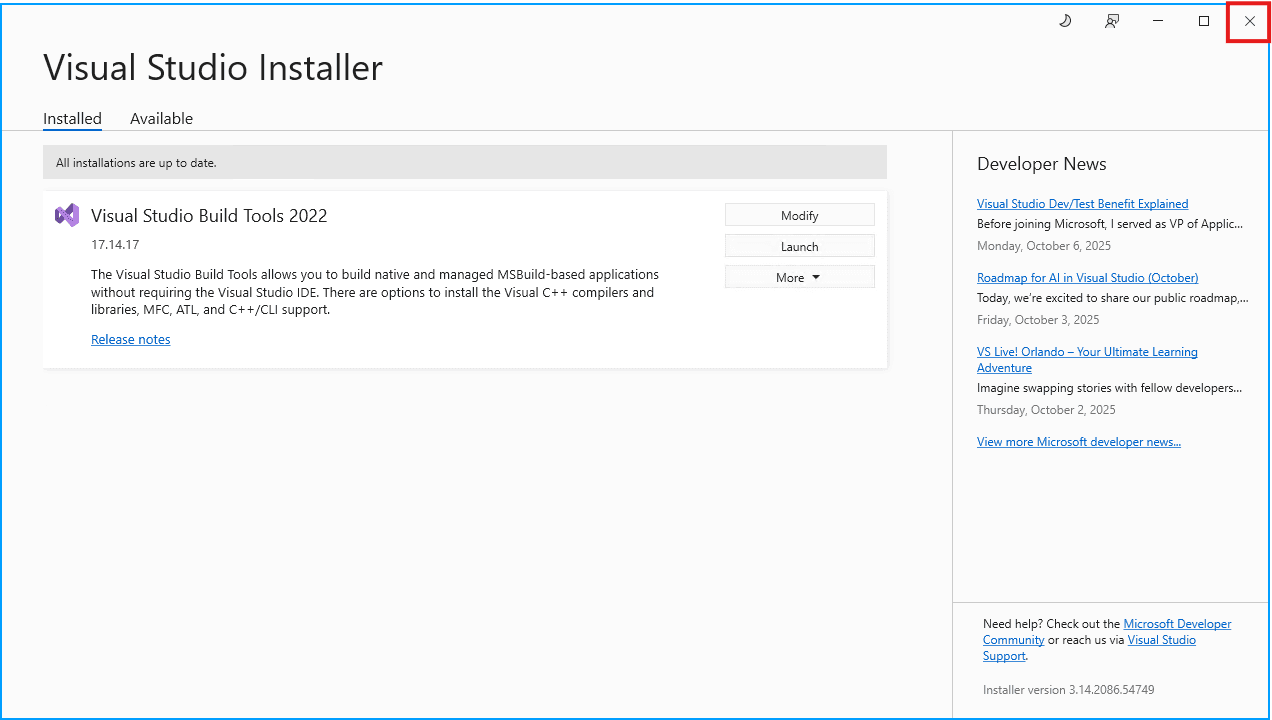
Wait for the download and install to complete, it should not take more than a minute or so. Then simply close out of the installer.
At this point you must restart your PC
Installing ComfyUI Zluda
- It is HIGHLY recommended you clone the repo to
C:\ - You should be using the CMD Prompt and not Powershell for this
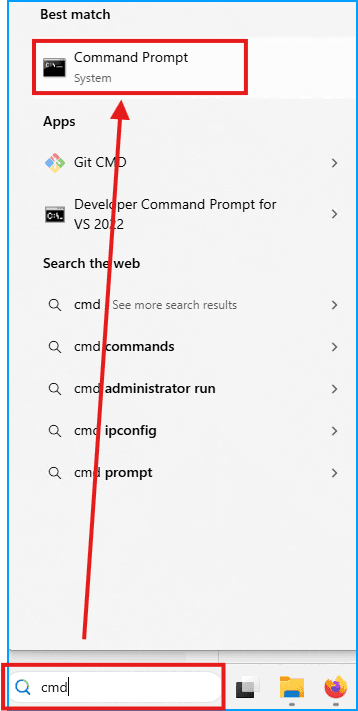
Open up the Command Prompt by typing “cmd” in the Windows search and then selecting the “Command Prompt”.
Then navigate to the root of the C:\ drive by pasting in:
cd C:\Then clone the git repo with:
git clone https://github.com/patientx/ComfyUI-Zluda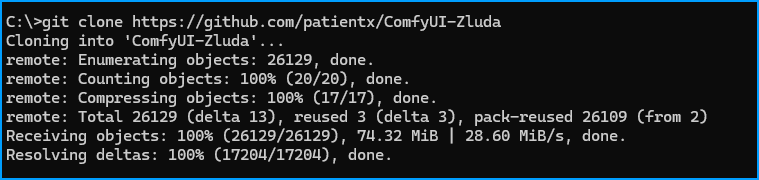
Leave the CMD Prompt open and move to the next section.
Whitelist the ComfyUI-Zluda Folder
You must whitelist the directory or Windows Security will quaruntine essential files during installation.
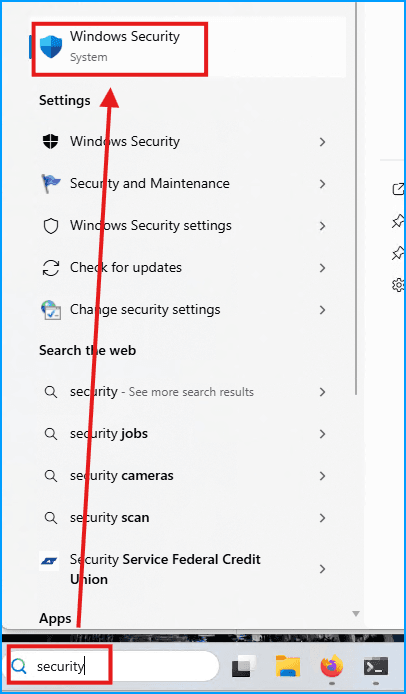
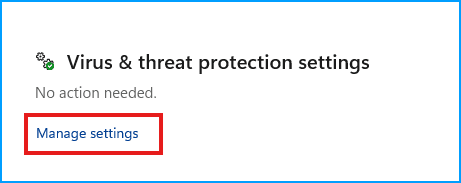
Open up Windows Security by typing “security” in the Windows search.
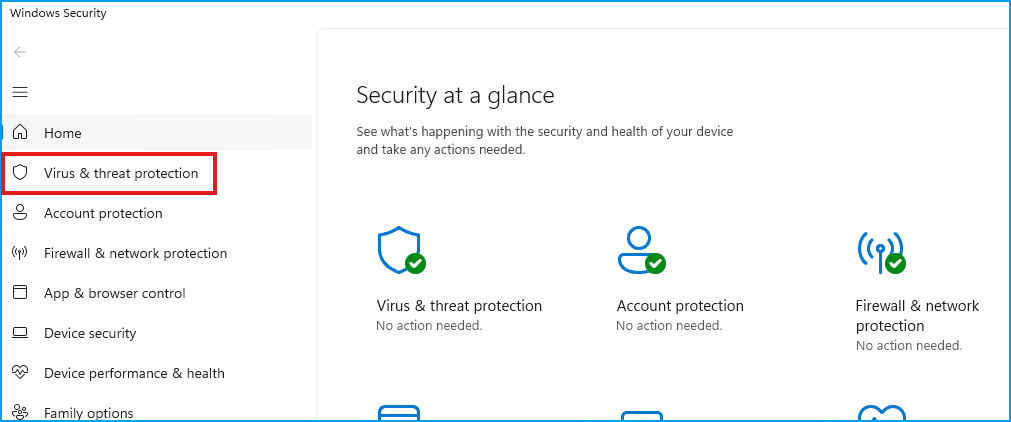
On the left panel, click “Virus & threat protection”
Find the “Virus & threat protection settings” section and click “Manage Settings”
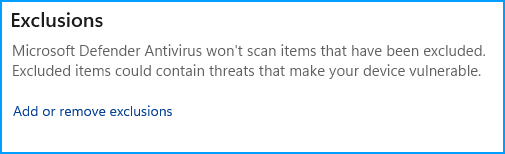
Scroll to the bottom and find “Exclusions”, then click “Add or remove exclusions”
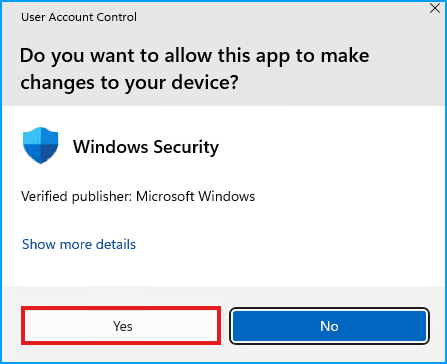
When prompted to all this app to make changes, click “Yes”
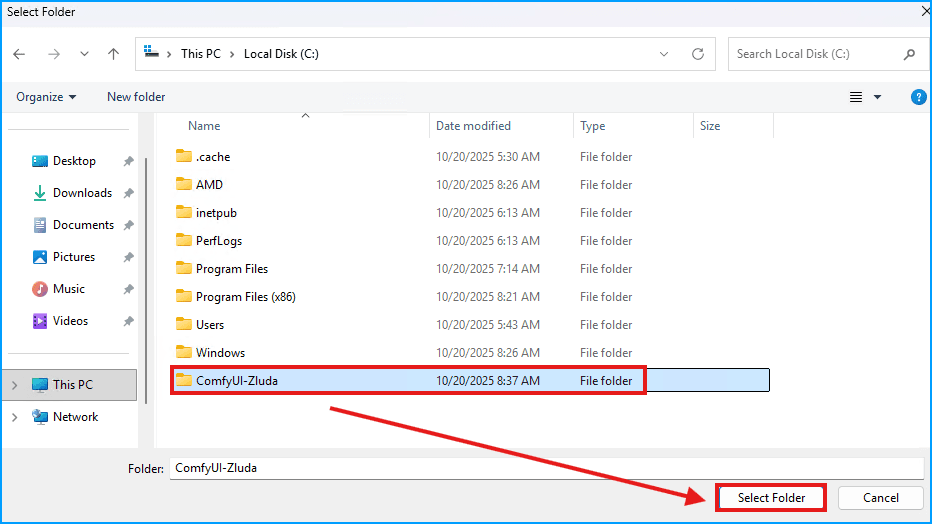
Then click “Add an exclusion” then “Folder”
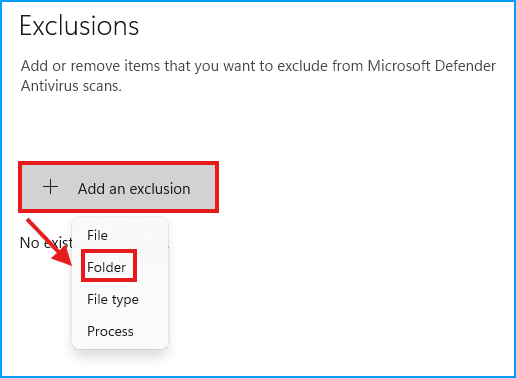
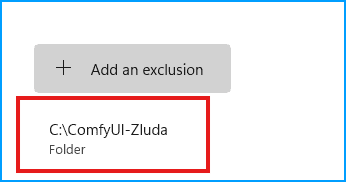
Then select the folder C:\ComfyUI-Zluda and then click “Select Folder”
You should now see it listed. You can close Windows Security now.
Install ComfyUI Zluda
Back in the CMD Prompt, enter the ComfyUI-Zluda folder with:
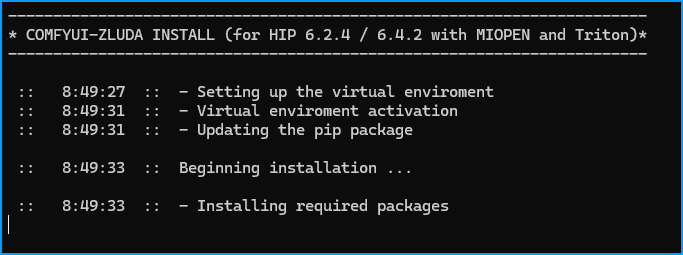
cd ComfyUI-ZludaThen run the installer
install-n.batThe installation should begin. This can take some time so please be patient. After installation, it will automatically open ComfyUI in the browser.
First Use
Once the install finishes you will see the browser open to ComfyUI with the “Templates” section open.
The CMD Prompt must remain open while using ComfyUI
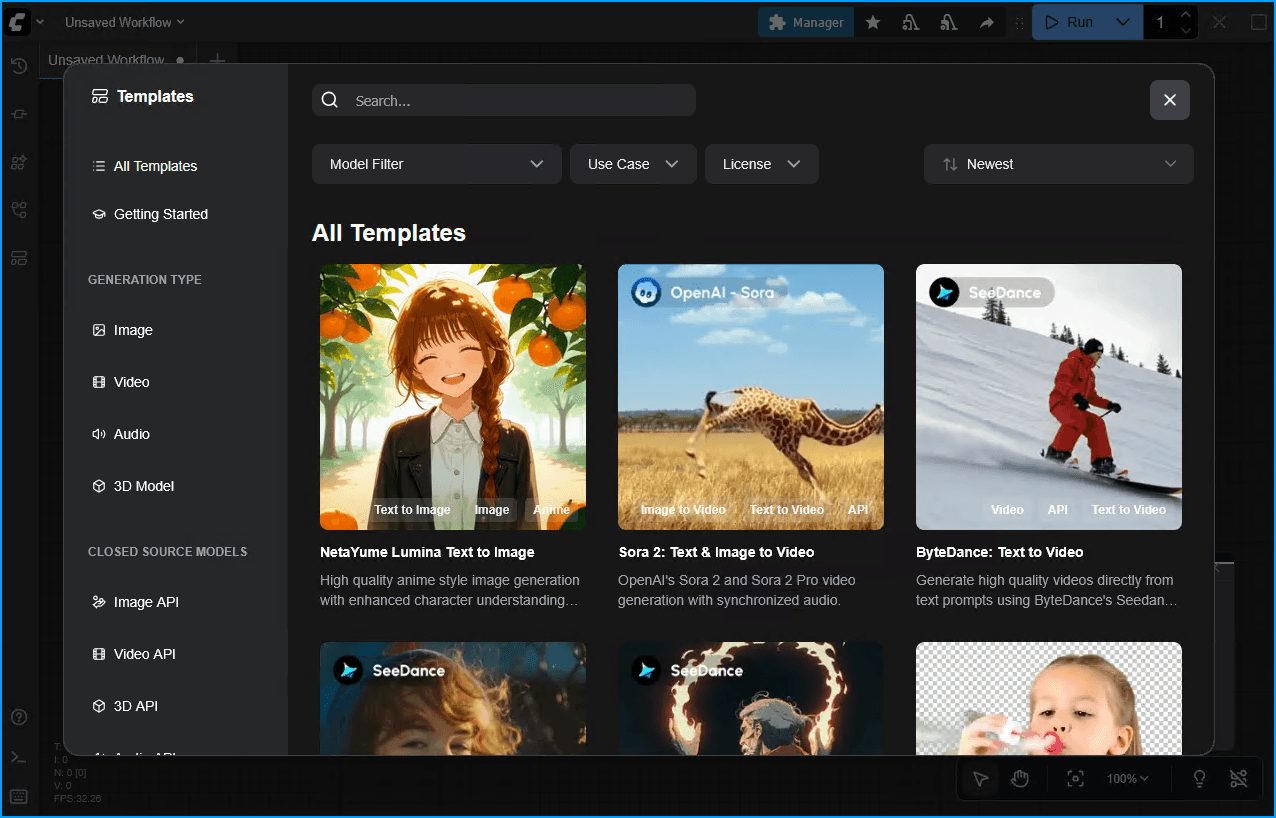
Select the “NetaYume Lumina Text to Image” template. Then download the template.
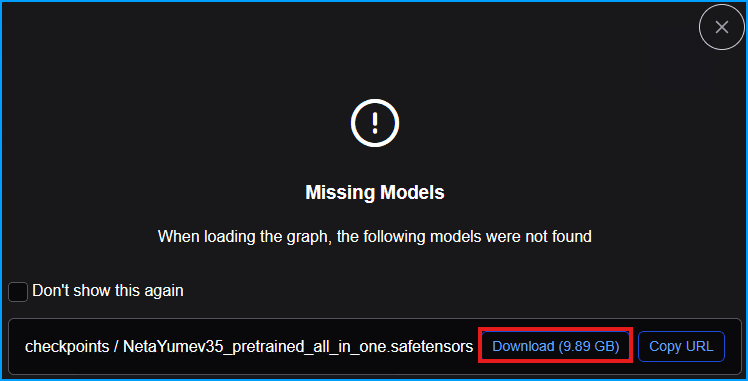
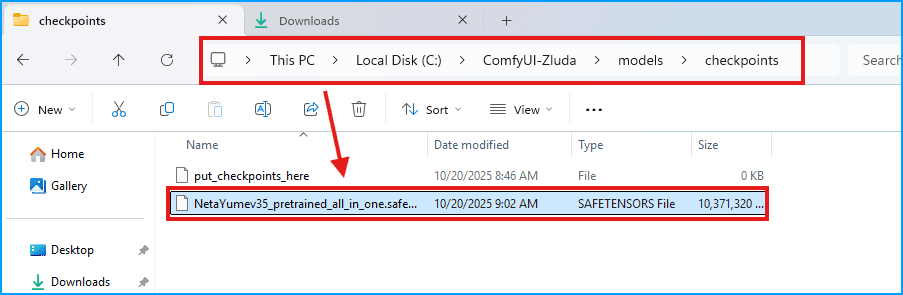
The model will download to your Downloads directory, open that directory up and the transfer the model to the C:\ComfyUI-Zluda\models\checkpoints folder.
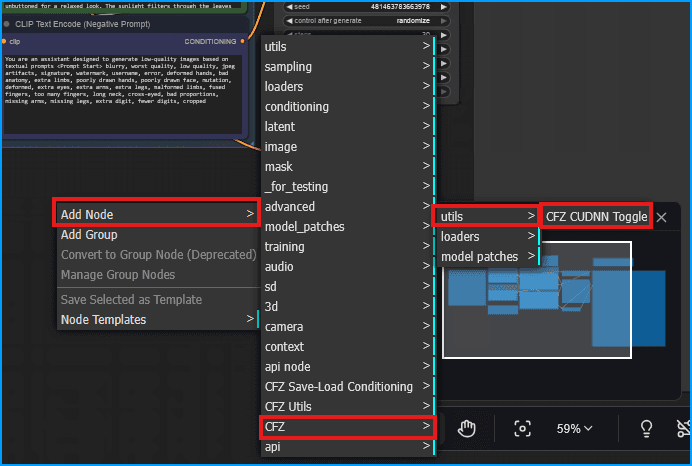
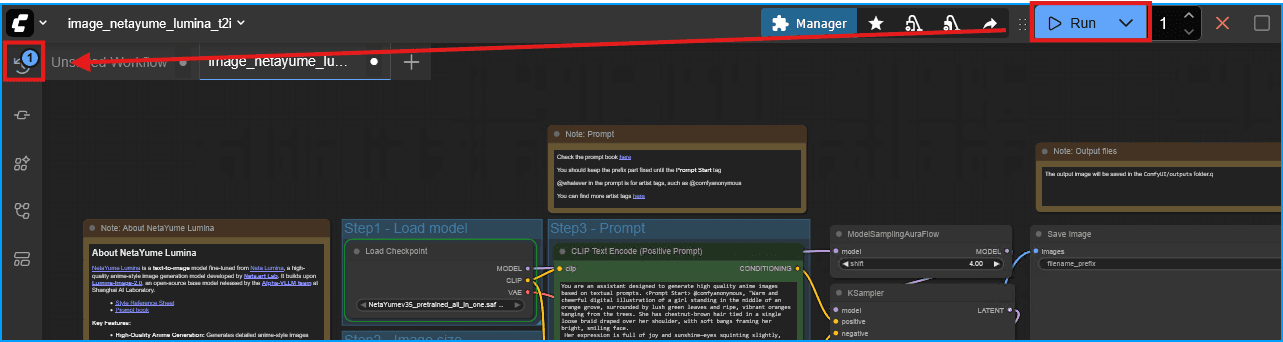
However, a new node needs to be created for the workflow to run, and you will likely need to use this in all of your workflows. Right click on the open space in the workflow pane, and then select Add Node > CFZ > utils > CFZ CUDNN Toggle.
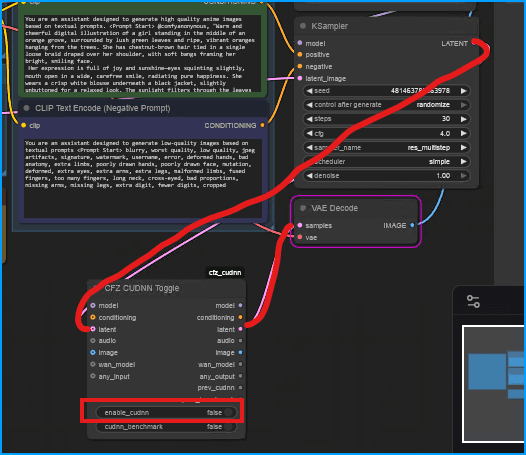
Then identify the “VAE Decode” node and on the left side “samples” input, move the pink line to the CFZ CUDNN Toggle “latent” input. Then from the CFZ CUDNN Toggle “latent” output, move it to the “samples” input on the VAE Decode Node. Finally, set the “enable_cudnn” to false on the CFZ CUDNN Toggle.
It should look something like this:
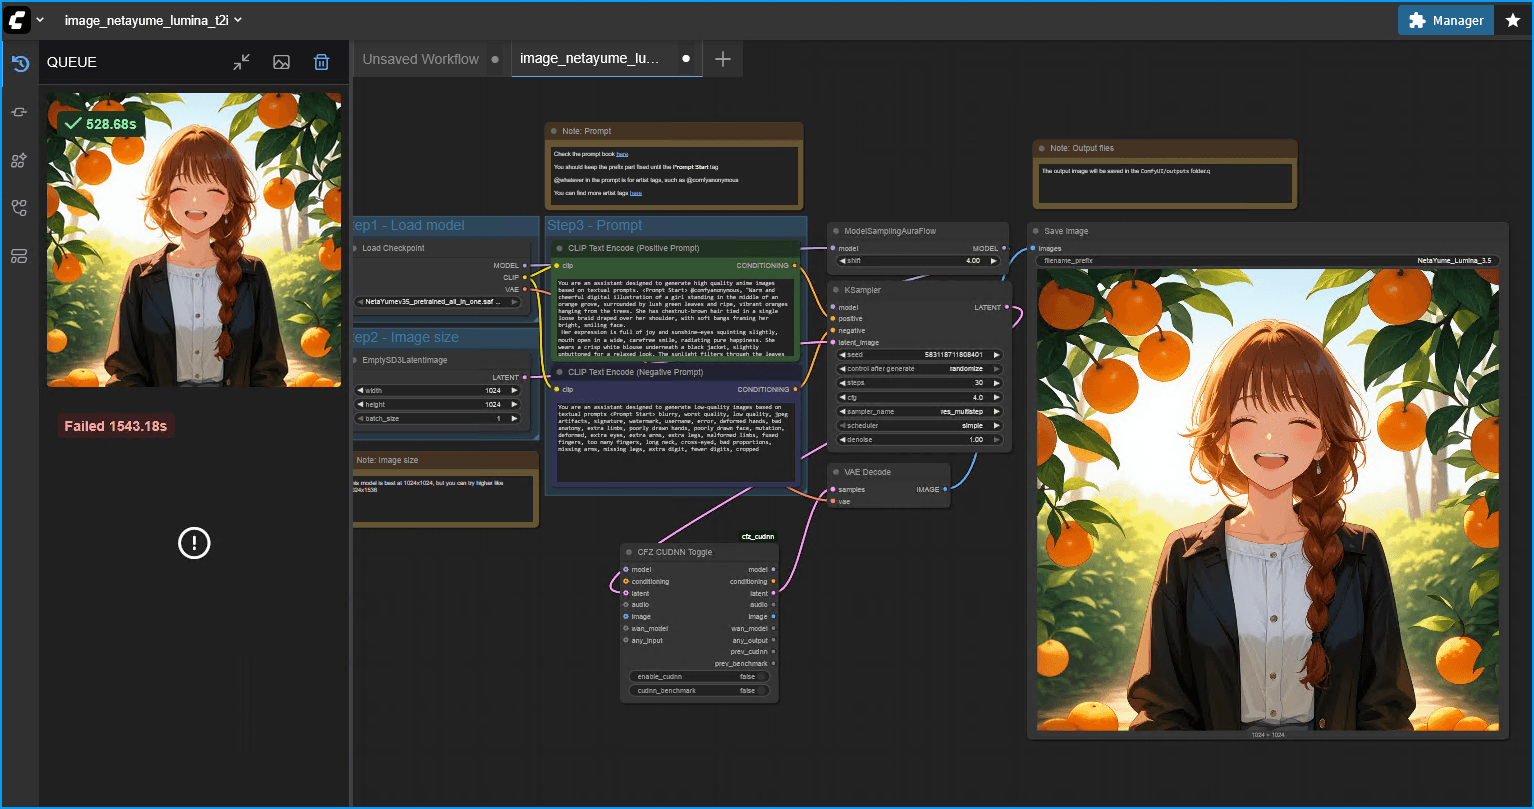
You should now be able to click the “Run” button and have the image generated. Then you can click the “Queue” button to see the generated images.
On a 780M, the first time an image is generated with this model it will take 15-20 minutes. Every time after it will be MUCH faster (~300 seconds).
You can always check the CMD Prompt for errors. You will likely see “Compliation is in progress. Please wait…” for some time as the model compiles during the first run.
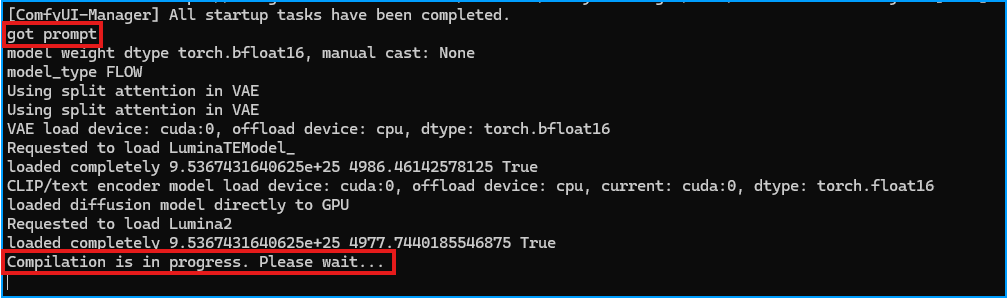
Once the Compilation completes you will be gin to see the progress bar for the image generation as it completes each step.

Eventually the image show both in the workflow and in the “Queue”.
Final Notes
I am not sure on the specifics, but it seems that each new model “type” will require a one-time compilation that can take up to 15 minutes.
The first generation will take longer than usual, ZLUDA is compiling for your GPU. It does this once for every new model type. This is necessary and unavoidable
You must keep the CMD prompt open while using ComfyUI. Once you are finished you can close the CMD prompt. To start it again, open up the CMD prompt and run C:\ComfyUI-Zluda\comfyui-n.bat.
You can make a shortcut to this on your desktop which is a bit easier.
Each time you run comfyui-n.bat the latest updates from the github repo will be pulled, so there is usually no need to update anything.
Make sure to continue to add the CFZ CUDNN Toggle to your workflows as you will likely receive an error otherwise.